Linux 安装 windows 虚拟机并显卡直通
说明
在 linux 上使用 KVM 安装 windows 虚拟机。然后将显卡直通 (pci passthrough) 进虚拟机,从而可以在 Windows 虚拟机上打游戏。
达到一台机器同时运行两个系统,充分利用硬件。
硬件信息
- CPU: AMD Ryzen™ 7 5800X
- 主板:ASUS TUF GAMING B550M-PLUS (WI-FI)
- RAM: Gloway DDR4 2666MHz 16GBx2
- GPU slot1: Zotac GTX 1060 3g
- GPU slot2: Yeston RX550 2g
- M.2 slot1: Samsung PM9A1 1TB
- M.2 slot2: KIOXIA RC10 500GB
- SATA: 西数紫盘 2TB
华硕 B550m 主板
官方参数:TUF GAMING B550M-PLUS (WI-FI) - Tech Specs|Motherboards|ASUS Global manual: C16520_TUF_GAMING_B550M-PLUS_WI-FI_UM_12P_WEB.pdf (asus.com.cn)
- PCIe slots
- 来自 ryzen 5000 CPU(非 G,否则为 PCIE 3.0)
- 1 x PCIe x16 slot (4.0 x 16 mode) PCIEX16_1支持pcie拆分,用于安装m.2扩展卡,可以拆分成4个4.0x4。需要在BIOS中将PCIEx16_1设置成 PCIe RAID Mode。
- 来自 B550 chipset
- 1 x PCIe x16 (3.0x4 mode)
- 1 x PCIe x1 *1 PCIEX16_2 will run x2 mode when PCIEX1 is used.
- 来自 ryzen 5000 CPU(非 G,否则为 PCIE 3.0)
- Storage
- 2 M.2:CPU(PCIE4.0 x4), PCH(PCIE3.0 x4)
- 4 SATA 6Gb/s:PCH
基本 windows 虚拟机
本部分创建一个可用的 windows 虚拟机,虽然没有显卡,但是也能完成很多事情,比如挂机录屏。
通过 virt-manger 创建虚拟机
libvirt是一个开源的虚拟机管理 API,可以管理 KVM, Xen, VMvare, QEMU 等虚拟化工具的虚拟机。包含库 (libvirt)、命令行工具 (virsh)、和 virt-manger 等 GUI 工具。参考:https://wiki.libvirt.org/page/FAQ
使用 virt-manger 创建 win10 虚拟机,详细步骤参考:How To Install Windows 10 on Ubuntu KVM? – Getlabsdone.com。这里就不再详细介绍了,只提一些注意点。
添加磁盘不同方式
添加磁盘有多种方式,不同方式的性能对比:(89) Adding VirtIO and passthrough storage in Virtual Machine Manager - YouTube
- 创建 qcow2 文件
- 可以选择 virtio, SATA 等总线协议。virtio 性能最好,但是安装 windows 时需要额外安装驱动。
- 利用已有磁盘分区,同样可以选择 virtio, SATA 等总线协议。
- pci 直通磁盘
安装 QXL 驱动
- 在安装好 windows 虚拟机后,运行 virtio drivers iso 中的
virtio-win-guest-tools.exe,该程序会安装其余驱动程序。比较重要的是 QXL 显示适配器驱动,该驱动会使得显示更加流畅
此时 windows 虚拟机已经可以使用了。但是创建虚拟机时,默认会使用默认的网桥virbr0,而它是 NAT 的,有自己的地址段。因此 host 可以访问虚拟机,但是从 host 外无法访问虚拟机。
为了让其它设备也能自由访问虚拟机,需要设置下面要介绍的虚拟网桥
修改为桥接网络
使用 docker、lxc、libvirt 时,都会创建默认的 bridge 设备,如 virbr0 便是 libvirt 创建的。
➜  ~ brctl show
bridge name     bridge id               STP enabled     interfaces
br-d1cfd67efd10         8000.0242abdcc8f5       no              veth461ccef
br0             8000.be316828842b       yes             enp7s0
                                                        vnet1
docker0         8000.0242ff18344e       no              veth2305c74
                                                        veth69f27d6
lxdbr0          8000.00163ecbf2fc       no
virbr0          8000.525400bf6a2c       yes             vnet0
libvirt 创建不同类型网络参考:Networking - Libvirt Wiki
- nat:虚拟机位于一个虚拟的网段,通过 nat 到宿主机上网。libvirt 默认提供一个叫做
default的网络 - bridge:虚拟机和物理机共享网络。
虚拟机想要使用 bridge 模式,分为两步
- 在 linux 中创建 bridge 设备
- virt-manger 中创建网络,使用该 bridge 设备
netplan/networkd创建bridge
ubuntu20.04 起使用 netplan 管理网络,桌面版的 render 使用 NetworkManger,服务器版则使用 networkd。
- NetworkManger 用于图形化界面管理网络
- networkd 使用配置文件管理 对于复杂的网络来说,还是 networkd 更合适。
ps. 还有其它方式,如使用 iproute2/ip, bridge-utils/brctl创建bridge,参考:Network bridge - ArchWiki (archlinux.org)
- 关闭 NetworkManger,启动 networkd
sudo systemctl stop NetworkManager
sudo systemctl disable NetworkManager

sudo systemctl enable systemd-networkd
sudo systemctl start systemd-networkd
- 编辑配置文件
- eth0 改为实际网卡名字,pcie 网卡前缀一般为 enp
- 其中 eth0 dchp4 false 表示该接口上不会尝试去 dhcp 请求 ip 地址。要想访问 host,需要通过 br0 的 ip 地址
# 10-yyy.yaml
network:
  version: 2
  renderer: networkd
  ethernets:
    eth0:
      dhcp4: false
      dhcp6: false
  bridges:
    br0:
      dhcp4: true
      dhcp6: true
      interfaces:
        - eth0
- 应用`netplan apply
NetworkManger(不推荐)
ubuntu20.04 使用 netplan 管理网络,其中桌面版 render 使用 NetworkManger,一些教程使用/etc/network/interfaces 创建 bridge 设备已经不适用了。
使用 NetworkManger 创建 bridge 参考:How to add network bridge with nmcli (NetworkManager) on Linux - nixCraft (cyberciti.biz)
nmcli con add ifname br0 type bridge con-name br0
nmcli con add type bridge-slave ifname enp7s0 master br0
注意点
-
启用了 bridge 设备时,需要关闭原有以太网设备。之后访问机器得通过 br0。
- ssh 连接时会导致连接断开,因此需要用脚本执行上面两条命令。
- 新启用的 br0 会拥有 LAN 的 ip 地址,但是地址相较于原本地址会发生改变。可以在路由器中看到新的 ip 地址,然后 ssh 连接
- 或者使用 wifi 维持另一个网络连接
- 无法在 wifi 设备上创建 bridge,只能是有线以太网。
virt-manger 添加网络
virt-manger 中,在编辑->连接详情->虚拟网络添加一个网络
显卡直通
参考资料
- 最完整的 Arch wiki:PCI passthrough via OVMF - ArchWiki (archlinux.org)
- KVM 创建虚拟机并显卡直通详细博客:Creating a Windows 10 kvm VM on the AMD Ryzen 9 3900X using VGA Passthrough - Heiko's Blog % Virtualization (heiko-sieger.info)
- 帮助我解决了 windows 蓝屏问题的博客:GPU passthrough - my switch to Linux
- 比较好的 github page:GPU Passthrough on GNU/Linux | gpu-passthrough (clayfreeman.github.io)
PVE 资料
- https://pve.proxmox.com/wiki/PCI_Passthrough
- Download (spice-space.org)
- AMD 5000XT, 6000XT, reset bug: gnif/vendor-reset: Linux kernel vendor specific hardware reset module for sequences that are too complex/complicated to land in pci_quirks.c (github.com)
步骤总结
对于可热插拔的设备,在 virt-manger 中添加需要直通的 host pci 设备即可(可热插拔的设备,虚拟机启动时 vfio_pci 接管设备驱动,关闭虚拟机时,host 可重新访问),但是对于显卡这种无法热插拔的设备,则较为复杂:
- 需要通过 lspci 命令,查看 pci 设备的总线地址,设备 id,以及所处的 IOMMU group
- 如果显卡单独位于一个 IOMMU group,则可以直通,可以进行之后步骤
- 否则,尝试移动显卡位置(另一个 pciex16 的槽),看是否为单独 group
- 不行的话需要尝试 ACS patch(见后),可能导致不稳定
确定可以直通后步骤:
- bios 开启虚拟化(intel: vt-x, AMD: SVM) 和iommu(intel: vt-d, AMD: AMD-Vi) 支持
- 以我的 AMD 平台为例,需要开启 SVM,IOMMU,ACS(位于 AMD CBS 中,BIOS 中搜索关键词即可)
- virt-manger 中添加 pci 设备,选择显卡 group 下的所有设备(通常另一个为声卡)
-
grub 修改内核启动参数(grub2 通过编辑/etc/default/grub,然后 sudo update-grub)
- 开启 iommu
- 在启动时将显卡绑定到 vifo_pci 驱动上(还有相同 group 下的声卡)
- 最终我的启动参数示例
-
显卡处于虚拟化环境中会拒绝工作,需要在 virt-manger XML 中添加额外参数。参考archiwiki
- vendor_id:对于 Nvidia 的显卡,会报 43 错误。在早期的驱动需要下面的 vendor_id,但是最新的显卡驱动已经不需要了。在 windows 内更新显卡驱动便会正常工作。
- hidden:让显卡不知道位于虚拟机中(windows 还是知道的)
什么是 IOMMU

- PCIE 支持 requst id,因此可以识别不同设备,每个设备可以使用自己的虚拟地址空间 (I/O virtual address, IOVA),IOMMU 负责转换
- 然后设备之间还可以通过 DMA 直接 peer to peer 通信,这些通信不经过 IOMMU,因此可能导致问题,比如网卡的 DMA 请求发送到了磁盘。PCIe Access Control Services (ACS) 便用于解决这个问题。它使我们能够知道设备间是否能够直接通信以及是否能够关闭。
- 对于不支持 ACS 的设备,IOMMU 将其归为一个 group。
- PCI 直通必须直通一个 IOMMU group 的所有设备(除掉特殊的 PCI root 设备)
PCIe 连接的通道由 CPU 或者主板芯片组(以前的南北桥)提供。是否支持 ACS 和 CPU 有关
On a typical Intel chipset, PCIe root ports are provided via both the processor and the PCH (Platform Controller Hub). The capabilities of these root ports can be very different. On the latest Linux kernels we have support for exposing the isolation of the PCH root ports, even though many of them do not have native PCIe ACS support. On Xeon class processors (except E3-1200 series), the processor-based PCIe root ports typically support ACS. Client processors, such as the i5/i7 Core processor do not support ACS, but we can hope future products from Intel will update this support.
You cannot change the IOMMU groups. It is determined by the motherboard and the BIOS. You can put it in different slots and see if that helps. You can try different BIOS versions, or buy a X570 motherboard. And you can use the pcie_acs_override if you don't care about the device isolation, which means that the device passed through to the VM can still talk to the host and/or devices in other VMs.
查看主板 iommu 组分布
使用下面脚本,得到主板上 iommu 组的信息
#!/bin/bash
shopt -s nullglob
for g in $(find /sys/kernel/iommu_groups/* -maxdepth 0 -type d | sort -V); do
    echo "IOMMU Group ${g##*/}:"
    for d in $g/devices/*; do
        echo -e "\t$(lspci -nns ${d##*/})"
    done;
done;
我的 IOMMU 分布 可知:
- 靠近 CPU 一侧的 nvme 插槽(PCIE 4.0 x 4)位于单独的 14 号组(CPU 通道)
- 位于靠近 CPU 的一侧的显卡插槽(PCIE 4.0 x16)位于单独的 16 号组(CPU 通道)
- 其余:显卡插槽 2(PCIE 3.0 x4)、nvme 插槽(PCIE 3.0 x 4)、以太网卡、wifi6 无线网卡和 SATA 控制器、USB 控制器均位于 15 号组(主板通道)
Please be patient. This may take a couple seconds.
Group:  0   0000:00:01.0 Host bridge [0600]: Advanced Micro Devices, Inc. [AMD] Starship/Matisse PCIe Dummy Host Bridge [1022:1482]
Group:  1   0000:00:01.1 PCI bridge [0604]: Advanced Micro Devices, Inc. [AMD] Starship/Matisse GPP Bridge [1022:1483]   Driver: pcieport
Group:  2   0000:00:01.2 PCI bridge [0604]: Advanced Micro Devices, Inc. [AMD] Starship/Matisse GPP Bridge [1022:1483]   Driver: pcieport
Group:  3   0000:00:02.0 Host bridge [0600]: Advanced Micro Devices, Inc. [AMD] Starship/Matisse PCIe Dummy Host Bridge [1022:1482]
Group:  4   0000:00:03.0 Host bridge [0600]: Advanced Micro Devices, Inc. [AMD] Starship/Matisse PCIe Dummy Host Bridge [1022:1482]
Group:  5   0000:00:03.1 PCI bridge [0604]: Advanced Micro Devices, Inc. [AMD] Starship/Matisse GPP Bridge [1022:1483]   Driver: pcieport
Group:  6   0000:00:04.0 Host bridge [0600]: Advanced Micro Devices, Inc. [AMD] Starship/Matisse PCIe Dummy Host Bridge [1022:1482]
Group:  7   0000:00:05.0 Host bridge [0600]: Advanced Micro Devices, Inc. [AMD] Starship/Matisse PCIe Dummy Host Bridge [1022:1482]
Group:  8   0000:00:07.0 Host bridge [0600]: Advanced Micro Devices, Inc. [AMD] Starship/Matisse PCIe Dummy Host Bridge [1022:1482]
Group:  9   0000:00:07.1 PCI bridge [0604]: Advanced Micro Devices, Inc. [AMD] Starship/Matisse Internal PCIe GPP Bridge 0 to bus[E:B] [1022:1484]   Driver: pcieport
Group:  10  0000:00:08.0 Host bridge [0600]: Advanced Micro Devices, Inc. [AMD] Starship/Matisse PCIe Dummy Host Bridge [1022:1482]
Group:  11  0000:00:08.1 PCI bridge [0604]: Advanced Micro Devices, Inc. [AMD] Starship/Matisse Internal PCIe GPP Bridge 0 to bus[E:B] [1022:1484]   Driver: pcieport
Group:  12  0000:00:14.0 SMBus [0c05]: Advanced Micro Devices, Inc. [AMD] FCH SMBus Controller [1022:790b] (rev 61)   Driver: piix4_smbus
Group:  12  0000:00:14.3 ISA bridge [0601]: Advanced Micro Devices, Inc. [AMD] FCH LPC Bridge [1022:790e] (rev 51)
Group:  13  0000:00:18.0 Host bridge [0600]: Advanced Micro Devices, Inc. [AMD] Matisse/Vermeer Data Fabric: Device 18h; Function 0 [1022:1440]
Group:  13  0000:00:18.1 Host bridge [0600]: Advanced Micro Devices, Inc. [AMD] Matisse/Vermeer Data Fabric: Device 18h; Function 1 [1022:1441]
Group:  13  0000:00:18.2 Host bridge [0600]: Advanced Micro Devices, Inc. [AMD] Matisse/Vermeer Data Fabric: Device 18h; Function 2 [1022:1442]
Group:  13  0000:00:18.3 Host bridge [0600]: Advanced Micro Devices, Inc. [AMD] Matisse/Vermeer Data Fabric: Device 18h; Function 3 [1022:1443]   Driver: k10temp
Group:  13  0000:00:18.4 Host bridge [0600]: Advanced Micro Devices, Inc. [AMD] Matisse/Vermeer Data Fabric: Device 18h; Function 4 [1022:1444]
Group:  13  0000:00:18.5 Host bridge [0600]: Advanced Micro Devices, Inc. [AMD] Matisse/Vermeer Data Fabric: Device 18h; Function 5 [1022:1445]
Group:  13  0000:00:18.6 Host bridge [0600]: Advanced Micro Devices, Inc. [AMD] Matisse/Vermeer Data Fabric: Device 18h; Function 6 [1022:1446]
Group:  13  0000:00:18.7 Host bridge [0600]: Advanced Micro Devices, Inc. [AMD] Matisse/Vermeer Data Fabric: Device 18h; Function 7 [1022:1447]
Group:  14  0000:01:00.0 Non-Volatile memory controller [0108]: Samsung Electronics Co Ltd NVMe SSD Controller PM9A1/PM9A3/980PRO [144d:a80a]   Driver: nvme
Group:  15  0000:02:00.0 USB controller [0c03]: Advanced Micro Devices, Inc. [AMD] Device [1022:43ee]   Driver: xhci_hcd
Group:  15  0000:02:00.1 SATA controller [0106]: Advanced Micro Devices, Inc. [AMD] Device [1022:43eb]   Driver: ahci
Group:  15  0000:02:00.2 PCI bridge [0604]: Advanced Micro Devices, Inc. [AMD] Device [1022:43e9]   Driver: pcieport
Group:  15  0000:03:00.0 PCI bridge [0604]: Advanced Micro Devices, Inc. [AMD] Device [1022:43ea]   Driver: pcieport
Group:  15  0000:03:04.0 PCI bridge [0604]: Advanced Micro Devices, Inc. [AMD] Device [1022:43ea]   Driver: pcieport
Group:  15  0000:03:08.0 PCI bridge [0604]: Advanced Micro Devices, Inc. [AMD] Device [1022:43ea]   Driver: pcieport
Group:  15  0000:03:09.0 PCI bridge [0604]: Advanced Micro Devices, Inc. [AMD] Device [1022:43ea]   Driver: pcieport
Group:  15  0000:04:00.0 VGA compatible controller [0300]: Advanced Micro Devices, Inc. [AMD/ATI] Baffin [Radeon RX 550 640SP / RX 560/560X] [1002:67ff] (rev ff)   Driver: amdgpu
Group:  15  0000:04:00.1 Audio device [0403]: Advanced Micro Devices, Inc. [AMD/ATI] Baffin HDMI/DP Audio [Radeon RX 550 640SP / RX 560/560X] [1002:aae0]   Driver: snd_hda_intel
Group:  15  0000:05:00.0 Non-Volatile memory controller [0108]: KIOXIA Corporation NVMe SSD [1e0f:0009] (rev 01)   Driver: nvme
Group:  15  0000:06:00.0 Network controller [0280]: Intel Corporation Wi-Fi 6 AX200 [8086:2723] (rev 1a)   Driver: iwlwifi
Group:  15  0000:07:00.0 Ethernet controller [0200]: Realtek Semiconductor Co., Ltd. RTL8125 2.5GbE Controller [10ec:8125] (rev 05)   Driver: r8169
Group:  16  0000:08:00.0 VGA compatible controller [0300]: NVIDIA Corporation GP106 [GeForce GTX 1060 3GB] [10de:1c02] (rev a1)   Driver: vfio-pci
Group:  16  0000:08:00.1 Audio device [0403]: NVIDIA Corporation GP106 High Definition Audio Controller [10de:10f1] (rev a1)   Driver: vfio-pci
Group:  17  0000:09:00.0 Non-Essential Instrumentation [1300]: Advanced Micro Devices, Inc. [AMD] Starship/Matisse PCIe Dummy Function [1022:148a]
Group:  18  0000:0a:00.0 Non-Essential Instrumentation [1300]: Advanced Micro Devices, Inc. [AMD] Starship/Matisse Reserved SPP [1022:1485]
Group:  19  0000:0a:00.1 Encryption controller [1080]: Advanced Micro Devices, Inc. [AMD] Starship/Matisse Cryptographic Coprocessor PSPCPP [1022:1486]   Driver: ccp
Group:  20  0000:0a:00.3 USB controller [0c03]: Advanced Micro Devices, Inc. [AMD] Matisse USB 3.0 Host Controller [1022:149c]   Driver: xhci_hcd
Group:  21  0000:0a:00.4 Audio device [0403]: Advanced Micro Devices, Inc. [AMD] Starship/Matisse HD Audio Controller [1022:1487]   Driver: snd_hda_intel
一个 group 里有多个设备怎么办
主板上的不同 PCIe slot 可以连接到 CPU 上或者 PCH(主板芯片组) 上。我的主板貌似将所有设备都放入了一个 group。因此我的显卡 2 和 nvme 固态盘等设备都无法直通。
对于一个组里有很多设备有一些解决方法:IOMMU Groups - What You Need to Consider - Heiko's Blog - VFIO (heiko-sieger.info)
- 更新内核版本,新的内核版本可能对主板支持的更好,IOMMU group 会改变
- 移动设备位置
- 安装 kernel patch:https://wiki.archlinux.org/title/PCI_passthrough_via_OVMF#Bypassing_the_IOMMU_groups_(ACS_override_patch)
但是我目前就选择直通 slot 1 显卡算了。
直通 slot1 或 slot2 的权衡
直通 slot1
- slot1 显卡的风扇会被 slot2 显卡的 PCB 版挡住,散热不太好
- 解决方法:使用 PCIE 显卡延长线(但是 x16 的太贵了,90RMB)
- boot gpu 默认为 slot 1 的问题。BIOS 无法设置 primary display,导致 windows 虚拟机会蓝屏 (PCI passthrough via OVMF - Passing_the_boot_GPU_to_the_guest
- 该问题已解决
直通 slot2
- slot2 和主板上的其它设备位于一组,无法直通 slot2
- 使用 ACS patch
- 我 B550 的主板,slot2 的虽然是 x16 长度的,但是只有 x4 PCIE 3.0 的带宽,显卡一般最少需要 x8 PCIE 3.0,否则会对性能有影响,甚至无法工作
- 一般来说双显卡时,两个槽应该都是工作在 x8 的模式下的吧。为何我的主板不支持将 slot1 的 lane 分给 slot2 呢?(因为slot1 pcie通道来自CPU,slot2来自主板)
直通 boot gpu的问题
直通 boot gpu 存在一些问题,这里是对该问题的进一步总结
参考资料
- 问题相关讨论:GPU Assistance - Select boot GPU - Software & Operating Systems / VFIO - Level1Techs Forums
- 要么 bios 支持选择 primary gpu
- 要么 swap gpu slot
- 解释问题原理,以及解决:Explaining CSM, efifb=off, and Setting the Boot GPU Manually - The Passthrough POST
- 是否需要 dump vbios:(8) When is a GPU ROM required and how does it get used? : VFIO (reddit.com)
问题可能导致的现象
- windows循环蓝屏。自己直通1063遇到的,解决办法可以不插显示器启动,或者使用命令reset显卡
- 报43错误,驱动安装不上。1060换成AMD 6500xt时遇到的,解决办法就是不插显示器启动。(后面给czw在PVE里直通amd 6500xt时又遇到一样问题,但是解决办法不一样。
问题原因
- uefi 是电脑启动后 cpu 最早运行的代码
- uefi 需要初始化 primary gpu,因为需要设置菜单。This is because UEFI setup menus, along with boot splash screens, must work in a generic way, as UEFI cannot possibly include a driver for every possible GPU.
- UEFI 初始化后,暴露给 linux 的是修改后的 vBIOS (shadow copy)。If the host UEFI already initialized the device, the host UEFI makes a“shadow”copy of the GPU’s vBIOS on startup, and that is what Linux exposes as the device’s vBIOS.
- guest 也有自己的 UEFI(开源的 OVMF),也需要初始化设备。而 host 暴露给 guest 的是 shadow copy,故冲突。OVMF usually hangs at this stage.
方法 0:关闭显示器启动
关闭 primary gpu 的显示器,second gpu 插上 hdmi 欺骗器(不插的话相当于没有显示器,启动时自检,显卡亮白灯,但是对于linux还是可以进入系统)
可以使用脚本避免重启电脑,参考遇到的问题里的[Windows 启动时循环蓝屏]。
方法一:CSM
UEFI 开启 CSM。让 UEFI 初始化另一个 GPU。关于 CSM 和 UEFI 你要知道的一些事 - 知乎 (zhihu.com)
试过后对我没有作用
(8) Passing through custom ROM file doesn't change anything : VFIO (reddit.com)
If you're using an MSI x370 Pro like I was, there isn't actually a setting for this. The solution is to install linux in UEFI mode and enable Windows 10 WHOQL Support (even though you're booting to Linux). This is a hackish solution that causes the board to use a second GPU instead of the GPU in the primary slot.
类似于下面要说的 efifb:off
I've got 2 graphics cards, a 2070 and a 1080. The 2070 I'm using as pass-through, the 1080 is the one I'm using for basic Linux stuff. On boot, the 2070 is initialised as the primary display by the MB and since I've blacklisted it from grub it basically only displays the Linux kernel version and nothing else. Then, rest of the startup is (effectively) silent, until Linux starts X, which then uses the 1080 as it's display since that's what I've configured it to use.
方法二:efifb:off(成功)
保证 boot 时,不使用 primary GPU。
- linux 启动时会显示启动日志和 tty login 到终端中 (console)。在 linux 桌面发行版中,console 被输出到 framebuffer 中。
- 显卡驱动和 EFI/BIOS 能够提供这个 framebuffer
- 在 linux 启动的早期(还没有加载显卡驱动之前),使用 EFI/VESA 提供的 framebuffer。而这便会使用 firmware 指定的 primary gpu。
相当于禁用了 tty?
重新测试 两张显卡都连接显示器,主显卡直通。
- 默认情况下,boot logo 显示在 primary 上,画面没有问题。启动完成后主显示器显示 login shell。启动 vm,黑屏,远程连接显示 43 错误。
- 主显卡不连接显示器,boot logo 显示在 second 上,画面颜色不对,ubuntu logo 缺少东西。启动 vm 没问题
- 开启 efifb:off,刚开始主显示器上显示选择是否进 bios 画面,接着主显示器熄灭。副显示器只显示了 logo,F2 黑屏(没有 log 输出)。最后进入了系统(没有 login shell)。启动 vm 没有问题。
方法三:qemu 设置 vBIOS
QEMU can expose the vBIOS from a ROM file supplied to it by libvirt. 获得 vBIOS 方法
-
dump:Dump_GPU_vBIOS/dump_vbios.sh at master · SpaceinvaderOne/Dump_GPU_vBIOS (github.com) (8) How to dump GPU VBIOS on linux? : VFIO (reddit.com)
- 从网络上下载(TechPowerup)
使用vbios
<hostdev mode='subsystem' type='pci' managed='yes'>
 <source>
 <address domain='0x0000' bus='0x01' slot='0x00' function='0x0'/>
 </source>
 <rom file='/path/to/vbios.rom'/>
 <address type='pci' domain='0x0000' bus='0x00' slot='0x04' function='0x0'/>
</hostdev>
试过后报错
➜  ~ sudo virsh start win10
error: Failed to start domain 'win10'
error: internal error: qemu unexpectedly closed the monitor: 2023-05-25T06:28:54.441761Z qemu-system-x86_64: warning: This family of AMD CPU doesn't support hyperthreading(2)
Please configure -smp options properly or try enabling topoext feature.
2023-05-25T06:28:55.270270Z qemu-system-x86_64: -device vfio-pci,host=0000:0a:00.0,id=hostdev3,bus=pci.5,addr=0x0,romfile=/home/yfy/scripts/data/vbios-amd-6500xt.bin: vfio_listener_region_add received unaligned region
2023-05-25T06:29:00.830154Z qemu-system-x86_64: -device vfio-pci,host=0000:0a:00.0,id=hostdev3,bus=pci.5,addr=0x0,romfile=/home/yfy/scripts/data/vbios-amd-6500xt.bin: Failed to mmap 0000:0a:00.0 BAR 0. Performance may be slow
2023-05-25T06:29:00.875494Z qemu-system-x86_64: -device vfio-pci,host=0000:0a:00.0,id=hostdev3,bus=pci.5,addr=0x0,romfile=/home/yfy/scripts/data/vbios-amd-6500xt.bin: failed to find romfile "/home/yfy/scripts/data/vbios-amd-6500xt.bin"
发现
- 只有开启 vm 后,才可以 dump bios,否者会报 output error
- 关闭屏幕下开机,vm 显卡正常。但是 dump 的 vbios 通不过检验。反而是打开屏幕下开机,vm 显卡不正常的可以通过检验。
Valid ROM signature found @0h, PCIR offset 370h
        PCIR: type 0 (x86 PC-AT), vendor: 1002, device: 743f, class: 030000
        PCIR: revision 0, vendor revision: 1404
Error, ran off the end
Valid ROM signature found @0h, PCIR offset 370h
        PCIR: type 0 (x86 PC-AT), vendor: 1002, device: 743f, class: 030000
        PCIR: revision 0, vendor revision: 1404
Valid ROM signature found @ae00h, PCIR offset 1ch
        PCIR: type 3 (EFI), vendor: 1002, device: 743f, class: 030000
        PCIR: revision 0, vendor revision: 0
                EFI: Signature Valid, Subsystem: Boot, Machine: X64
Valid ROM signature found @14400h, PCIR offset 1ch
        PCIR: type 3 (EFI), vendor: 1002, device: 743f, class: 000000
        PCIR: revision 0, vendor revision: 0
                EFI: Signature Valid, Subsystem: Boot, Machine: ARM 64-bit
        Last image
(8) Do you need or not need a vbios file? : VFIO (reddit.com) 使用错误的 vbios 不会对显卡造成损坏 OR, you can use vbios dumps from other people on the Internet. It's less wise, but in some intentional personal testing I was unable to kill my nvidia GPU's by initializing them on my VM with intentionally bad/truncated/wrong-version romfile=xxx roms. In fact some of those worked for my single GPU passthrough scenarios on GTX780's and a 2080Ti despite being vastly different versions than my GPU's actual current vbios version. Minor differences I presume.
和实际 flash gpu rom 是不同的 I personally wouldn't advise actually flashing your GPU's bios unless required. From what I can see, that is not the same thing as the vbios romfile= qemu option where you're asking your guest to execute a fake rom as a one-off from your host instead of the broken (or valid if correctly isolated) boot rom data on your GPU as it were already initialized by the host earlier in the boot.
nv 的有 rom 只能运行一次的问题,amd 没有 Furthermore, it seems only NVIDIA cards have this problem and even then only some. They can be initialized once per boot. That's it. AMD cards don't seem to have this problem AFAIK and present their rom the same all the time, so the VM has no trouble initializing them again and again and again once given one.
什么时候需要指定 bios This means that if your motherboard draws to the GPU on boot with system information, a logo and what not on the GPU you want to pass through then you're already too late and would need a vbios file if you cannot stop this behavior in your host's bios settings.
主板不支持指定核显独显,或者多显卡下不支持指定某一块显卡 If your motherboard doesn't have an option to strictly pick which GPU to use (integrated vs dedicated, or an option of which of multiple dedicated to use) it may initialize it too and you will need a vbios file for a guest all the same.
Single GPU hosts don't get any choice and have to draw their POST information ...somewhere... So you will almost always need a vbios file outside very special motherboard configurations (Usually Server boards handle this nicely, even if they only have a shitty onboard 8MB vga plug for basic terminal display only)
Basically if the host uses the card at all, it's initialized and the rom is borked for the boot. A vbios file will be needed for a guest to reinitialize it and works around this nicely.
可以动态直通显卡? I personally don't think about it too much. I've written my own vfio script compatible with my single GPU host and use a vbios file and use my linux desktop for as long as I like until I want to pass the gpu to the guest, it dynamically unbinds the nvidia driver and stops lightdm before starting the guest with the vbios romfile included to reinitialize the card.
不关机重置 gpu? This makes me imagine that putting a PC to sleep then waking it as you start your qemu VM may be another way to 'reboot' the GPU and restore its vbios rom ready for the guest without a true host reboot (With a low enough sleep state), but who wants to do that. Maybe something for me to experiment with though. It could also help make the GPU more stable when returning to a host in some circumstances.
单 gpu 直通?
(8) Single Nvidia passthrough: endless kernel NVRM logs : VFIO (reddit.com)
遇到的问题
RDP 很卡
发现设备管理器中显示的是 Microsoft 基本显示适配器,在显示适配器上手动安装 QXL 驱动后解决(位于 virtio 光盘的 qxlod 目录下)
VNC 与 RDP
- 远程桌面 RDP 使用自己的 remote display 显示适配器,和一个通用非即插即用设备 (uPnP)
-
tightvnc 则会使用 QXL controller + PnP
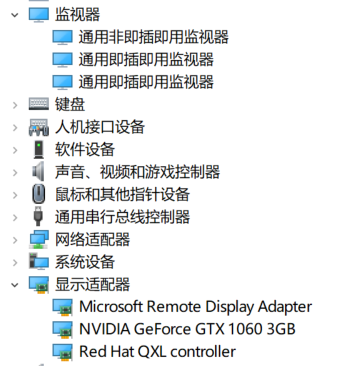
- 后面发现貌似 tightvnc 和 parsec 远程连接(使用虚拟显示适配器)和 VNC(使用显卡或者 QXL)都会使用,优先 VNC。
parsec 连接玩游戏很糊
发现是显示器选择了 125% 的缩放导致的
steam link 连接时 windows 用户登录弹窗
参考:Can't get past Steam Input Dialog Box :: Steam Remote Play (steamcommunity.com)
问题为使用 steam link 连接时,windows 需要登录。但是会弹出一个窗口,说:Would you like to accept secure desktop input from Steam? steam link 远程登陆时无法点击系统弹窗,导致无法进入。弹窗也说需要坐在电脑前点击确认
解决:如果 windows 没有锁屏,那么 steam link 登录就不需要输入密码登录 windows。可以在 windows 上安装 tightvnc,通过 vnc 连接后,steam link 连接时就不会输密码了(而且 vnc 连接也不会掉)
Windows 虚拟机内 OBS 录屏
通过 rdp 远程连接 windows 时使用 OBS 录屏,会发现断开 rdp 连接后,录到的是黑屏。原因是 rdp 连接时,使用的是虚拟的显示适配器(无法调节分辨率),虚拟的声卡。当断开连接时,这些都会消失,故无法录屏。
解决办法为使用 vnc,vnc 连接后开启录屏,断开连接后,仍然在录屏。
Linux 启动时黑屏
由于 host gpu 处于第二个槽,导致 X 启动失败
https://wiki.archlinux.org/title/PCI_passthrough_via_OVMF#X_does_not_start_after_enabling_vfio_pci
这里也提到了
解决
-
kernel cmd
-
xorg
Windows 启动时循环蓝屏
windows 启动时蓝屏,蓝屏两次后进入恢复界面,选择关机后再次启动依然蓝屏。
进一步发现
重启 linux 时,如果直通的显卡上连着显示器,那么 windows 启动就会循环蓝屏。解决办法为先拔掉显示器,linux 启动后再插上,之后启动 VM-windows 就不会蓝屏。
蓝屏时代码为
解决
发现问题可能是由于将 boot GPU 直通导致的PCI passthrough via OVMF - ArchWiki (archlinux.org)
The GPU marked as
boot_vgais a special case when it comes to doing PCI passthroughs, since the BIOS needs to use it in order to display things like boot messages or the BIOS configuration menu. To do that, it makes a copy of the VGA boot ROM which can then be freely modified.
但是我的主板没办法调节使用哪个 GPU 作为启动 GPU 在 https://blog.twenska.de/blog/GPU_passthrough/中看到类似问题,并提到解决方法
查看/var/log/libvirt/qemu/win10.log.0会发现大量的以下错误:
2022-07-21T06:50:56.222055Z qemu-system-x86_64: vfio_region_write(0000:08:00.0:region1+0x345990, 0x13801,8) failed: Device or resource busy
然后启动虚拟机前运行以下脚本即可
#!/bin/bash
echo 1 > /sys/bus/pci/devices/0000\:08\:00.0/remove && echo 1 > /sys/bus/pci/rescan
virsh start win10
发现 Arch wiki 提到相同的解决方法BAR_3:_cannot_reserve[mem]
host 安装 nvidia 驱动后启动会反复 load nvidia 驱动
相当于 bind vifo 不起作用?
解决办法为blacklist掉nvidia驱动
grub2 - How to temporarily blacklist nvidia driver at boot time - Ask Ubuntu
(8) After loading vfio-pci instead of nvidia, my dmesg has dozens of errors : VFIO (reddit.com)
理论上是不需要 blacklist driver 的,不然如果是两张 nv 的显卡,则另一张岂不是无法使用 nvidia 驱动?
I have a setup with two nVidia cards (GTX 970 for passthrough and GT 1030 for Linux host) and I'm not blacklisting anything.
(8) After loading vfio-pci instead of nvidia, my dmesg has dozens of errors : VFIO (reddit.com) /etc/modprobe.d/nvidia.conf: (You probably will have to create this file.)
性能优化
其它
Using Looking Glass to stream guest screen to the host
ACS patch
最早的 patch:LKML: Alex Williamson: [PATCH] pci: Enable overrides for missing ACS capabilities
VFIO tips and tricks: IOMMU Groups, inside and out VFIO tips and tricks: VFIO+VGA FAQ
自动编译内核 mdPlusPlus/VFIO: This repository contains all my work in the VFIO space (github.com)
acs_patch id 用法:Help with PCI Express passthrough (ACS - IOMMU issue) + kernel bugfix | Proxmox Support Forum
其它: 这个 vendor-reset 是干嘛用的: gnif/vendor-reset: Linux kernel vendor specific hardware reset module for sequences that are too complex/complicated to land in pci_quirks.c (github.com) 提到安全:(4) Is ACS override really that unsafe? : VFIO (reddit.com)