跳转至

记录 jellyfin 相关使用

安装

docker 安装 jellyfin

参考:Container | Jellyfin 三个不同镜像源:

  • Official container image: jellyfin/jellyfin Docker Pull Count.
  • LinuxServer.io image: linuxserver/jellyfin Docker Pull Count.
  • hotio image: hotio/jellyfin Docker Pull Count.

查看它们的 Dockerfile,可以看到安装了不同显卡的驱动,包含 va-api,opencl。

nvidia-opencl-icd-340 \
i965-va-driver \
mesa-va-drivers && \

gpu 转码硬件加速

Intel GPU | Jellyfin

dev/dri

默认已经设置好用户权限了

docker-compose 中设置

devices:
      - /dev/dri/:/dev/dri/
root@689728fac458:/# l -alh /dev/dri
total 0
drwxr-xr-x 2 root root                80 Sep 29 19:41 ./
drwxr-xr-x 6 root root               360 Sep 29 19:41 ../
crw-rw---- 1 root video         226,   0 Sep 29 19:41 card0
crw-rw---- 1 root videoGaFCwCBc 226, 128 Sep 29 19:41 renderD128
root@689728fac458:/# id 1000
uid=1000(abc) gid=1000(abc) groups=1000(abc),44(video),100(users),104(videoGaFCwCBc)
root@689728fac458:/#

nvidia gpu

NVIDIA GPU | Jellyfin

version: '3'
services:
  jellyfin:
    image: jellyfin/jellyfin
    user: 1000:1000
    network_mode: 'host'
    volumes:
      - /path/to/config:/config
      - /path/to/cache:/cache
      - /path/to/media:/media
    runtime: nvidia
    deploy:
      resources:
        reservations:
          devices:
            - capabilities: [gpu]

Installing the NVIDIA Container Toolkit — container-toolkit 1.14.1 documentation

sudo nvidia-ctk runtime configure --runtime=docker

sudo systemctl restart docker

LXC 安装 jellyfin

相对于 docker 好处:docker 我没有解决 amd gpu 无法调用 opencl 进行 HDR 色调映射问题。而在 lxc 中通过 amd 官方驱动安装程序,可以手动安装 opencl 驱动,可以解决该问题。

  1. 安装 lxd(lxc 的前端)。ubuntu 下默认使用 snap 安装
  2. 创建 lxc 容器。使用默认配置。容器使用默认的 lxdbr0 网络,通过 NAT 到宿主机上网。
lxc launch -p default images:ubuntu/focal ubuntu20
  1. 安装Jellyfin
# 安装依赖
sudo apt install curl gnupg

# 添加jellyfin源
sudo mkdir -p /etc/apt/keyrings
curl -fsSL https://repo.jellyfin.org/jellyfin_team.gpg.key | sudo gpg --dearmor -o /etc/apt/keyrings/jellyfin.gpg

cat <<EOF | sudo tee /etc/apt/sources.list.d/jellyfin.sources
Types: deb
URIs: https://repo.jellyfin.org/$( awk -F'=' '/^ID=/{ print $NF }' /etc/os-release )
Suites: $( awk -F'=' '/^VERSION_CODENAME=/{ print $NF }' /etc/os-release )
Components: main
Architectures: $( dpkg --print-architecture )
Signed-By: /etc/apt/keyrings/jellyfin.gpg
EOF

# 安装
sudo apt update
sudo apt install jellyfin

# 启动jellyfin服务
systemctl enable jellyfin
systemctl start jellyfin

端口映射

lxc 的端口映射没有那么直观,是通过在容器配置中添加 device 实现的。有两种方式给设备:1)通过lxc config给容器添加设备(也可以lxc config edit直接修改容器配置文件)2)创建 profile,并给容器添加 profile。 为了以后知道设置了哪些端口映射,推荐使用 profile 方式。

lxc profile device add <profile> <device name> <device type> <key=value>*
lxc profile add <container> <profile>

lxc config device add <container> <device name> <device type> <key=value>*

例子:

lxc profile create proxy-jellyfin
lxc profile device add proxy-jellyfin proxy8096 proxy connect="tcp:127.0.0.1:8096" listen="tcp:0.0.0.0:8096"
lxc profile add ubuntu20 proxy-jellyfin

查看容器配置文件

lxc config show ubuntu20 --expanded

devices:
  proxy8096:
    connect: tcp:127.0.0.1:8096
    listen: tcp:0.0.0.0:8097
    type: proxy

目录映射

参考:How to add or mount directory in LXD (Linux container) - nixCraft (cyberciti.biz)

目录映射同样需要给容器添加 device。

lxc config device add ubuntu20 media disk source=/path/to/media_lib path=/media

对应配置文件

devices:
  media:
    path: /media
    source: /path/to/media_lib
    type: disk

subordinate uid,gid 映射

不过此时,容器内用户创建的文件在 host 上的权限会存在问题。查看映射目录的权限会发现全是 nobody(nobody uid 和 gid 都可以表示为 -1,即 65534)

drwxrwxr-x  1 nobody nogroup 1.9K Feb 16 12:34 Movie
drwxrwxr-x  1 nobody nogroup  368 Mar  2 23:21 TV
drwxrwxr-x  1 nobody nogroup 1.5K Feb 25 17:41 TV_anime

因此需要将 host 用户的 uid,gid 映射到容器内对应用户的 uid,gid。

  • lxc 容器内有许多用户,默认有 ubuntu(uid=1000,gid=1000)。如果我们需要映射给该用户,使用第一行命令即可。both 表示同时映射 uid 和 gid,第一个 1000 表示 host 用户 id,第二个 1000 表示容器内用户 id。
  • 但是由于我们运行 jellyfin 程序使用的是 jellyfin 进程,该进程创建的文件也是以 jellyfin 用户创建的。因此要映射 jellyfin 用户。而该用户 uid 和 gid 不相等 (uid=106,gid=112)。因此需要使用第二条命令。参考:Custom user mappings in LXD containers | Stéphane Graber's website
lxc config set ubuntu20 raw.idmap "both 1000 1000"

printf "uid $(id -u) 106\ngid $(id -g) 112" | lxc config set ubuntu20 raw.idmap -

host 上还需要设置/etc/subuid,subgid,一般来说其中默认添加了创建的用户,并且不会重叠。没有的话,手动添加:

  • 下面设置表示 yfy 创建的 namespace,容器内用户 0-65536 被映射到 host 上的 100000-165536(格式user:first_id:count
yfy:100000:65536
root:1000:1

用户映射实验

容器中创建不同权限文件

-rw-r--r--  1 nobody   nogroup     4 Mar  4 09:09 host-root.txt
-rw-r--r--  1 jellyfin jellyfin    2 Mar  4 09:02 jellyfin.txt
-rw-r--r--  1 root     root        6 Mar  4 08:16 root.txt
-rw-r--r--  1 ubuntu   ubuntu      6 Mar  4 08:17 ubuntu.txt
-rw-r--r--  1 yfy      yfy         2 Mar  4 09:04 yfy.txt

root:x:0:0:root:/root:/bin/bash
jellyfin:x:106:112:
ubuntu:x:1000:1000::/home/ubuntu:/bin/bash
yfy:x:1001:1001:,,,:/home/yfy:/bin/bash

在 host 中读取到的文件权限

-rw-r--r-- 1 root    root       4  3月  4 17:09 host-root.txt
-rw-r--r-- 1 yfy     yfy        2  3月  4 17:02 jellyfin.txt
-rw-r--r-- 1 1000000 1000000    6  3月  4 16:16 root.txt
-rw-r--r-- 1 1001000 1001000    6  3月  4 16:17 ubuntu.txt
-rw-r--r-- 1 1001001 1001001    2  3月  4 17:04 yfy.txt

添加 GPU

给容器添加 gpu 类型设备:

devices:
  rx550:
    gid: "109"
    type: gpu

添加 gpu 后,容器内会出现/dev/dri/card0,renderD128。如果不指定 gid,则默认权限所有者和组被设置成 root,jellyfin 进程会无法调用显卡进行加速。

因此需要进容器查看 render 组的 gid,并将 jellyfin 用户添加到该组。然后在添加 gpu 设备时指定 gid。

# 容器内查看render组gid
cat /etc/group
#render:x:109:jellyfin

各种硬件加速

看 readme 文档介绍:linuxserver/docker-jellyfin (github.com)

amdgpu 驱动

OpenCL tone-mapping

amd gpu 需要使用 opencl 加速色调映射,因此需要安装 opencl 运行时。

amdgpu-install

  1. 官网下载”驱动“(deb 文件,只包含一个 amdgpu-install 脚本,通过该脚本进行驱动安装)
  2. 安装 AMDGPU 软件栈:有完全开源版本,有些组件也有 Proprietary 版本。一些组件(opencl, vulkan)是可选的
  • opencl 有两个实现,其中 rx550 需要安装 legacy 版本(非开源)
    • ROCr OpenCL stack, supports Vega 10 and later products
    • Legacy OpenCL stack (Proprietary), supports legacy products older than Vega 10
amdgpu-install -y --accept-eula --usecase=workstation --opencl=legacy --no-32
amdgpu-install -y --accept-eula --usecase=graphics   # install the All-Open components

amdgpu-install -y --accept-eula --usecase=workstation --vulkan=pro --opencl=legacy
  • ROCr: Provides support for Vega 10 and newer hardware.
  • Legacy: Provides support for hardware older than Vega 10. (Proprietary, requires EULA acceptance)

opengl: default opencl

Option Description
--opencl=rocr Installs ROCr OpenCL.
--opencl=legacy Installs legacy OpenCL. (Proprietary)
--opencl=rocr,legacy Installs both ROCr and legacy OpenCL.

vulkan

Option Description
--vulkan=amdvlk Installs open source Vulkan
--vulkan=pro Installs PRO Vulkan (Proprietary)
--vulkan=amdvlk,pro Installs both open and PRO Vulkan.

AMD AMF

As of Jellyfin 10.8 full OpenCL based hardware filtering in AMF is supported on Windows 10 and newer. AMD has not implemented the Vulkan based HW decoder and scaler in ffmpeg, the decoding speed may not be as expected on Linux. The closed source driver amdgpu-pro is required when using AMF on Linux.

(待解决)没有实现在 linux 下使用 amd amf 进行硬件加速。

[h264_amf @ 0x562d7fd98040] DLL libamfrt64.so.1 failed to open
Error initializing output stream 0:0 -- Error while opening encoder for output stream #0:0 - maybe incorrect parameters such as bit_rate, rate, width or height
malloc_consolidate(): invalid chunk size

参考:Jellyfin 10.5.5 Docker VAAPI hardware transcoding issues · Issue #3580 · jellyfin/jellyfin (github.com)

[Parsed_scale_vaapi_2 @ 0x563e3af4e980] Failed to render parameter buffer: 6 (invalid VASurfaceID).Mesa 20.1 or higher is required to enable VAAPI to transcode HEVC videos on AMD GPU.[h264_amf @ 0x5590871d0280] DLL libamfrt64.so.1 failed to openAMD AMF hasn't support any native hw decoder. To use AMF encoding on Ubuntu, you need to manually installamdgpu-proandamf-amdgpu-pro`.

Stream mapping:
  Stream #0:0 -> #0:0 (hevc (native) -> h264 (h264_amf))
  Stream #0:1 -> #0:1 (dts (dca) -> aac (libfdk_aac))
Press [q] to stop, [?] for help
[h264_amf @ 0x55dbac31ad40] encoder->Init() failed with error 7
Error initializing output stream 0:0 -- Error while opening encoder for output stream #0:0 - maybe incorrect parameters such as bit_rate, rate, width or height
[libfdk_aac @ 0x55dbac304c80] 2 frames left in the queue on closing
Conversion failed!

nvidia gpu

要求

  • host 安装 nvidia 驱动(不能使用开源驱动)
  • lxc 可以设置使用 nvidia.runtime。
lxc config set ubuntu20 nvidia.runtime true
  • jellyfin 中设置使用 Nvidia NVENC

刚开始报错,发现是缺少 libnvidia-encode, libnvidia-decode 两个库。在 host 中安装,但是显示已经安装了。 于是尝试在 lxc 容器中安装,但是发现貌似已经安装了。之后重启 lxc 容器不知为何就没有问题了。

Stream mapping:
  Stream #0:0 (hevc) -> setparams:default (graph 0)
  Stream #0:7 (pgssub) -> scale:default (graph 0)
  overlay:default (graph 0) -> Stream #0:0 (h264_nvenc)
  Stream #0:1 -> #0:1 (truehd (native) -> aac (libfdk_aac))
Press [q] to stop, [?] for help
[matroska,webm @ 0x563cc2ae6200] sub2video: using 1920x1791 canvas
[h264_nvenc @ 0x563cc2c89880] Cannot load libnvidia-encode.so.1
[h264_nvenc @ 0x563cc2c89880] The minimum required Nvidia driver for nvenc is 470.57.02 or newer
Error initializing output stream 0:0 -- Error while opening encoder for output stream #0:0 - maybe incorrect parameters such as bit_rate, rate, width or height
[libfdk_aac @ 0x563cc2c89140] 2 frames left in the queue on closing
Conversion failed!
/usr/lib/jellyfin-ffmpeg/ffmpeg -analyzeduration 200M -init_hw_device cuda=cu:0 -filter_hw_device cu -hwaccel cuda -hwaccel_output_format cuda -c:v h264_cuvid -autorotate 0 -i file:"/media/Movie/绿皮书 (2018)/绿皮书 (2018) - 1080p.mkv" -autoscale 0 -map_metadata -1 -map_chapters -1 -threads 0 -map 0:0 -map 0:1 -map -0:s -codec:v:0 h264_nvenc -preset p1 -b:v 14360000 -maxrate 14360000 -bufsize 28720000 -profile:v:0 high -g:v:0 72 -keyint_min:v:0 72 -vf

[h264_cuvid @ 0x5561f7fa97c0] Cannot load libnvcuvid.so.1
[h264_cuvid @ 0x5561f7fa97c0] Failed loading nvcuvid.
Stream mapping:
  Stream #0:0 -> #0:0 (h264 (h264_cuvid) -> h264 (h264_nvenc))
  Stream #0:1 -> #0:1 (ac3 (native) -> aac (libfdk_aac))
Error while opening decoder for input stream #0:0 : Operation not permitted

发现转码性能强的一批,看到的都是 400,200 帧的转码速率。

linux 迁移到 docker

Migrating | Jellyfin

version: '3'
services:
  jellyfin:
    image: jellyfin/jellyfin
    user: <uid>:<gid>
    network_mode: 'host'
    restart: 'unless-stopped'
    environment:
      - JELLYFIN_CACHE_DIR=/var/cache/jellyfin
      - JELLYFIN_CONFIG_DIR=/etc/jellyfin
      - JELLYFIN_DATA_DIR=/var/lib/jellyfin
      - JELLYFIN_LOG_DIR=/var/log/jellyfin
    volumes:
      - /etc/jellyfin:/etc/jellyfin
      - /var/cache/jellyfin:/var/cache/jellyfin
      - /var/lib/jellyfin:/var/lib/jellyfin
      - /var/log/jellyfin:/var/log/jellyfin
      - <path-to-media>:<path-to-media>

需要备份数据包含 4 部分

      - /var/lib/docker/docker_data/jellyfin/cache:/var/cache/jellyfin
      - /var/lib/docker/docker_data/jellyfin/log:/var/log/jellyfin
      - /var/lib/docker/docker_data/jellyfin/data:/var/lib/jellyfin
      - /var/lib/docker/docker_data/jellyfin/etc:/etc/jellyfin

配置

jellyfin 设置

一些经验

  • 改变 jellyfin 转码设置,是立即生效的,无需重启 docker
  • 实测 RX550 的薄弱 GPU 性能,勾选 HEVC 10bit 解码,反而会拖累编码过程,帧数更低。

Settings => 首页

  • 可以调整媒体库显示顺序
  • 可以将不同媒体库组合成一个显示 播放
  • 音频选择:播放默认音频
  • 家庭网络质量:设置默认的串流码率,如 20Mbps
  • 优先使用 fMP4-HLS 媒体容器:不知道如何生效

优先使用 fMP4 作为 HLS 播放的默认容器,从而可以在支持的设备上直接串流 HEVC 格式的内容

字幕

  • 字幕偏好:偏好字幕,下面字幕模式需要使用
  • 字幕模式:推荐设置为总是显示
    • 智能:音频为外语时,加载偏好字幕,否则无字幕。不太适用,因为:1 多音频时无效,2 即使是中文视频,最好也有字幕
    • 总是显示:显示偏好字幕。适用性最好,当有偏好字幕时会选择偏好,没有时选择默认。
    • 默认:根据元数据中“默认”,“强制”来显示字幕。可以看作总是显示的子集
    • 强制:根据元数据中“强制”来显示字幕
    • 无字幕
  • 是否烧录字幕
    • 自动:图片格式或复杂 ass/ssa 字幕(客户端可能不支持显示) p.s 建议以后支持一种更灵活的设置方法:无字幕,音频匹配偏好则无字幕,偏好字幕,默认,强制。通过调节这几个选项的顺序来实现不同策略

硬件加速

参考:Hardware Acceleration | Jellyfin

Jellyfin supports hardware acceleration (HWA) of video encoding/decoding using FFMpeg. FFMpeg and Jellyfin can support multiple hardware acceleration implementations such as Intel Quicksync (QSV), AMD AMF and NVIDIA NVENC/NVDEC through Video Acceleration APIs.

基础知识

常见视频编码

  • H.264/h264/AVC
    • Profile: High 10 = H.264 10bit:目前没有硬件支持 h264 10bit 解码
  • H.265/HEVC
    • Profile: Main, Main 10

浏览器支持的编码

Codec Support | Jellyfin

不同硬件支持

不同显卡对应支持的硬件编解码 API:

  • NVIDIA: NVENC
  • AMD: AMF, VA-API
  • Intel: QSV, VA-API
  • Apple: VideoToolbox
  • RPi: V4L2

不同方案参考: CPU 编解码:h265 -> h264 GPU 编解码:h265 -> GPU -> 中间帧 -> GPU -> h254 CPU 解码,GPU 编码:h265 10bit -> CPU -> 中间帧 -> GPU -> h254

测试方法

调试时,可以从 jellyfin 日志中把命令复制下来,来快速判断是否可以工作正常。

  • vaapi 测试
ffmpeg -init_hw_device vaapi=va:/dev/dri/renderD128
# Check the QSV and VA-API codecs
docker exec -it jellyfin /usr/lib/jellyfin-ffmpeg/vainfo

# Check the OpenCL runtime status
docker exec -it jellyfin /usr/lib/jellyfin-ffmpeg/ffmpeg -v verbose -init_hw_device vaapi=va -init_hw_device opencl@va

调用 VA-API 失败(/dev/dri/renderD128 权限错误导致)

[AVHWDeviceContext @ 0x557d76500880] No VA display found for device /dev/dri/renderD128.
Device creation failed: -22.
Failed to set value 'vaapi=va:/dev/dri/renderD128' for option 'init_hw_device': Invalid argument
Error parsing global options: Invalid argument

OpenCL 设备没找到(开启 tone-mapping 后,amd gpu 需要安装 opencl 驱动)

[AVHWDeviceContext @ 0x56158f868900] No matching devices found.
Device creation failed: -19.
Failed to set value 'opencl=ocl:0.0' for option 'init_hw_device': No such device
Error parsing global options: No such device

intel 核显

Intel GPU | Jellyfin

  • 转码:QSV, VA-API
  • HDR tonne mapping:QSV, OpenCL

vainfo 查看 QSV 和 VA-API 支持情况

  • iHD driver indicates support for the QSV and VA-API interfaces.
  • i965 driver indicates only support for the VA-API interface, which should only be used on pre-Broadwell platforms.
root@689728fac458:/# /usr/lib/jellyfin-ffmpeg/vainfo --display drm --device /dev/dri/renderD128
Trying display: drm
libva info: VA-API version 1.19.0
libva info: Trying to open /usr/lib/jellyfin-ffmpeg/lib/dri/iHD_drv_video.so
libva info: Found init function __vaDriverInit_1_19
libva info: va_openDriver() returns 0
vainfo: VA-API version: 1.19 (libva 2.19.0)
vainfo: Driver version: Intel iHD driver for Intel(R) Gen Graphics - 23.3.2 (95dc859)
vainfo: Supported profile and entrypoints
      VAProfileNone                   : VAEntrypointVideoProc
      VAProfileNone                   : VAEntrypointStats
      VAProfileMPEG2Simple            : VAEntrypointVLD
      VAProfileMPEG2Main              : VAEntrypointVLD
      VAProfileH264Main               : VAEntrypointVLD
      VAProfileH264Main               : VAEntrypointEncSliceLP
      VAProfileH264High               : VAEntrypointVLD
      VAProfileH264High               : VAEntrypointEncSliceLP
      VAProfileVC1Simple              : VAEntrypointVLD
      VAProfileVC1Main                : VAEntrypointVLD
      VAProfileVC1Advanced            : VAEntrypointVLD
      VAProfileJPEGBaseline           : VAEntrypointVLD
      VAProfileJPEGBaseline           : VAEntrypointEncPicture
      VAProfileH264ConstrainedBaseline: VAEntrypointVLD
      VAProfileH264ConstrainedBaseline: VAEntrypointEncSliceLP
      VAProfileVP8Version0_3          : VAEntrypointVLD
      VAProfileHEVCMain               : VAEntrypointVLD
      VAProfileHEVCMain               : VAEntrypointEncSliceLP
      VAProfileHEVCMain10             : VAEntrypointVLD
      VAProfileHEVCMain10             : VAEntrypointEncSliceLP
      VAProfileVP9Profile0            : VAEntrypointVLD
      VAProfileVP9Profile0            : VAEntrypointEncSliceLP
      VAProfileVP9Profile1            : VAEntrypointVLD
      VAProfileVP9Profile1            : VAEntrypointEncSliceLP
      VAProfileVP9Profile2            : VAEntrypointVLD
      VAProfileVP9Profile2            : VAEntrypointEncSliceLP
      VAProfileVP9Profile3            : VAEntrypointVLD
      VAProfileVP9Profile3            : VAEntrypointEncSliceLP
      VAProfileHEVCMain422_10         : VAEntrypointVLD
      VAProfileHEVCMain444            : VAEntrypointVLD
      VAProfileHEVCMain444            : VAEntrypointEncSliceLP
      VAProfileHEVCMain444_10         : VAEntrypointVLD
      VAProfileHEVCMain444_10         : VAEntrypointEncSliceLP

其它选项

反交错时使帧率翻倍

此设置使用去隔行时的场频,通常称为 Bob 去隔行,它将视频的帧频加倍,以提供完整的运动效果,就像在电视上观看隔行视频时看到的那样。

允许实时提取字幕:建议关闭

为避免视频转码,可以从视频中提取内置的字幕,并以纯文本的形式发送给客户端。在某些系统中这个提取的进程可能会花费较长时间并导致视频播放出现卡顿。如果禁用这个选项,当内置字幕不能被客户端设备原生支持时,字幕将通过视频转码被烧录进视频中。

  • 不明白其中内置字幕不能被客户端支持是什么意思。但是如果开启改选项,阿里云的视频播放过程无法显示字幕(提取速度太慢),一直显示提取元数据
  • 据说还可能导致:播放 nas 视频且视频很大时,需要把视频读取一遍,导致会卡很长一段时间才能开始播放

限制转码速度:建议开启

当转码或者再封装的进度距离当前播放进度足够远时,暂停这个过程以减少资源消耗。当观看视频时不经常调整播放进度的情况下,这个功能将非常有用。如果你遇到了播放问题,请关闭这个选项。
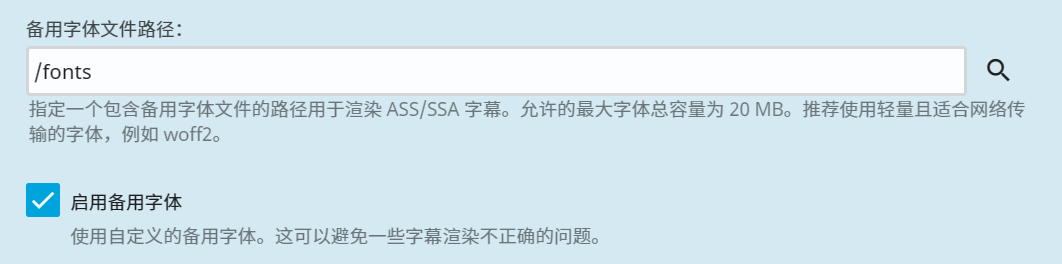
启用备用字体:解决中文字幕显示方框问题

使用自定义的备用字体。这可以避免一些字幕渲染不正确的问题。

遇到的问题

开启 va-api 加速后,播放报错

设置硬件加速 vaapi,但是播放显式不兼容的格式弹窗,通过查看 ffmpeg log,可以看到

[AVHWDeviceContext @ 0x562f58a85d40] No VA display found for device /dev/dri/renderD128.
Device creation failed: -22.
Failed to set value '/dev/dri/renderD128' for option 'vaapi_device': Invalid argument
Error parsing global options: Invalid argument

均是由于/dev/dri 权限设置问题导致的,可以通过 group-add 参数解决。

With the newer releases, you can the group-add docker parameter to get around the issue of /dev/dri/renderD128 needing "render" group membership in Ubuntu. If you use docker run, you can use the group name instead of the number(--group-add=render). In my /etc/group file, the group number for the render group is 122.

  • docker
    • docker run: --group-add="122"
    • docker-compose: group_add: "122"
  • lxc 需要设置 gpu 设备 gid

参考:

字幕乱码

中文字幕显示方框,需要设置备用字体。 在备用字体目录下放置字体 ttf 文件,框框消失。

root@ubuntu20 ➜  conf.d l /fonts
total 24M
-rw-rw-rw- 1 jellyfin jellyfin  12M Oct  8  2021 FZFSK.TTF
-rw-rw-rw- 1 jellyfin jellyfin 9.5M Nov 28  2017 FZHTK.TTF
-rw-rw-rw- 1 jellyfin jellyfin  14M Dec 21  2017 FZKTK.TTF
-rw-rw-rw- 1 jellyfin jellyfin 9.5M Nov 28  2017 FZSSK.TTF

控制台 -> 播放 -> 备用字体

播放 4K 120Mbps 卡顿,花屏

上述视频通常都是 HEVC 编码,而一般浏览器均不支持 HEVC 编码(常见浏览器支持的编码:Codec Support | Jellyfin),因此需要转码。

而 4K -> 4K 转码太费 gpu 性能。测试 rx550,选择 1080p 20Mbps 可以流畅播放(42fps)不花屏。而 1080p 60 和 40 都不行,并且都是 17fps。

参考: Jellyfin web client can't play 4k HEVC 120Mbps movies by direct playing and can't play 1080p 60Mbps through transcoding this kind of movies in local storage that in the LAN Jellyfin docker server · Issue #4338 · jellyfin/jellyfin (github.com)

开启 HDR 色调映射后播放视频报错

不同显卡对于色调映射的支持是不同的

  • intel:VPP 色调映射,和基于 Opencl 和 Cuda 的色调映射
  • nvidia:Cuda
  • amd:opencl

测试视频

  • 刀剑神域无夜星的咏叹调:4K HEVC SDR
  • 你的名字 2160p:4K HEVC HDR
  • 小黄人:4K HEVC HDR

媒体库中文框框

虽然字幕已经解决了,但是 system 的 font 并不会使用 Chinese library names are displayed as square · Issue #5636 · jellyfin/jellyfin (github.com)

jellyfin:
    volumes:
      - /usr/share/fonts:/usr/share/fonts
      - /usr/share/fontconfig:/usr/share/fontconfig

syncplay

nginx 反向代理导致 syncplay 不工作(添加到 group 后没有任何反映)Syncplay: how to? : r/jellyfin (reddit.com)

问题出在 nginx 没有代理 websocket,使用官方提供的 nginx 配置文件即可。 Nginx | Jellyfin

Failed to initialize NVML: Unknown Error

NOTICE: Containers losing access to GPUs with error: "Failed to initialize NVML: Unknown Error" · Issue #1730 · NVIDIA/nvidia-docker (github.com)

后面发现问题还在 记录一下正常时的 dev

I have no name!@ryzen:/$ ls /dev/
core  fd  full  mqueue  null  nvidia0  nvidiactl  nvidia-uvm  nvidia-uvm-tools  ptmx  pts  random  shm  stderr  stdin  stdout  tty  urandom  zero

插件(待续)

其它

copy stream url

可以用于 vrchat 等 video player。 但是有泄露 session 的风险,有人提出是否要修复

遇到的问题

直接播放 h265 的方法

windows、linux、mac 客户端:jellyfin-mpv-shim · PyPI

  • 利用 jellyfin 的投屏功能,将浏览器的播放转移到客户端上,任意格式不用转码

tmm 中文乱码

wget https://mirrors.aliyun.com/alpine/edge/testing/x86_64/font-wqy-zenhei-0.9.45-r2.apk
apk add --allow-untrusted font-wqy-zenhei-0.9.45-r2.apk

但是修改了 compose,会删除原本容器,因此需要重新设置。 永久办法,修改为第三方 docker 镜像dzhuang/tinymediamanager-docker: A repository for creating a docker container including TinyMediaManager with GUI interface. (github.com)

显卡硬件转码 datasheet

Video Encode and Decode GPU Support Matrix | NVIDIA Developer nVidia Hardware Transcoding Calculator for Plex Estimates (elpamsoft.com)

无法扫描出视频

原来 movie 格式内容

添加的根路径(如 /MediaLib/Disk1/WebDL/Jellyfin )下面可以有若干级子目录

但是每个子目录同级不能有其它视频文件,否则就不会扫描子目录,日志也看不出东西。